RC Basics: RC Race Craft - Mounting Tires
At the end your first year of RC racing, your skills should be developing to the point that you can run multiple laps without crashing or needing marshaling. The real goal is to finish a race or qualifying heat without needing assistance.
When you reach the point that crashing is no longer your biggest obstacle, it’s time to start working on your setup and addressing your maintenance routines.
The most critical ingredient to any setup is tires. Not only do you need the right tires, you need matching inserts, you need them mounted correctly, broken in properly, and conditioned appropriately. In this article I will discuss selecting the right tires and how to mount your tires.
When you are at your local track it’s pretty easy to figure out what tire to run, just ask the fast drivers. But as you begin to explore other tracks in your area, you need to learn how to select a tire that matches the track condition.
Here are some general tire guidelines:
- Loamy or loose dirt = need a bigger pin
- Hard pack with little dust = small pin or bar tire
- Less Traction = Need a softer compound tire
- More traction = harder compounds work
Here are some general insert guidelines:
- Bumpy track or low traction = try softer insert
- High Traction = Try harder insert
- Slick Tire = Run stiffest insert you can get
- Softer compounds = typically need slightly firmer inserts to assist with carcass structure
- Harder compounds = typically need slightly softer inserts to allow flex in carcass
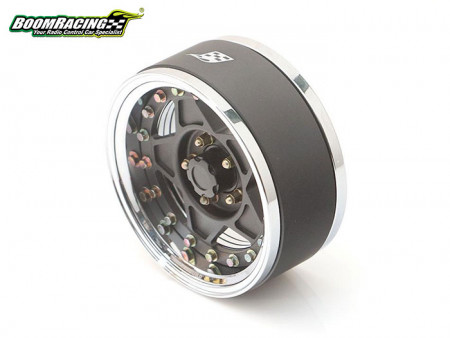
Mounting Tires:
I have heard 100 ways to mount tires, but this is the best way I have found. Everybody has their own preferences, so you can always add or remove a step in this guide if you experience better results while you're racing. However, this should get someone who's completely new set up to race and win!
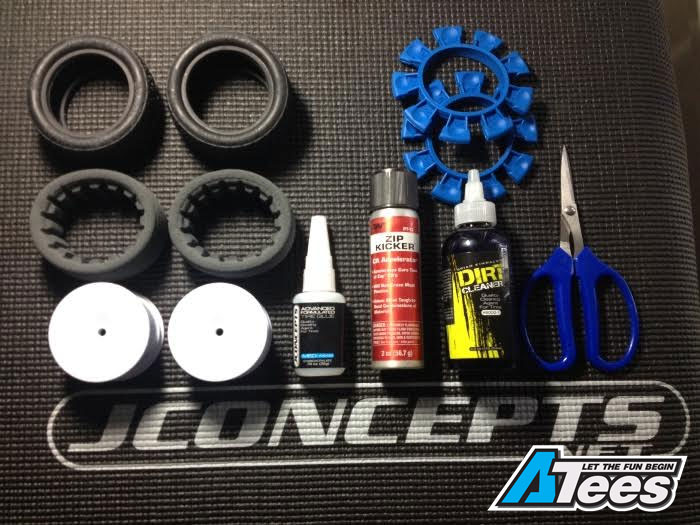
- Using a leather punch, put two small holes in tire carcass (one at top and one at bottom)
- Using Jconcepts Dirt Racing “Cleaning” liquid (#8000-1) clean inside bead of tire and rim. I have found the best way to do this is using the included open cell insert that comes with most tires and just a few drops of the cleaning solution. If you do it this way, this product will last a very long time and is quite economical.
- Once dry, proceed to mounting tires.
- I like to roll the tires in my hand to make sure the bead fits nicely in the glue channel
- I always use Jconcepts Satellite tire bands (#2212-1) when gluing tires.
- I always glue the inside of the tire first.
- Use quality glue, I choose Jconcepts Advance Formulated Tire Glue (#2043M) with a straw tip.
- After you have the bands mounted I make sure the bead is sitting nice within the channel
- With the tire sitting flat in front of you pull the bead slightly back in one spot and put a little glue in the channel working in a clockwise rotation.
- TIP: after you have applied glue in a section, hold the tire in both hands and with your thumbs press firmly in the center of the wheel. This will push the bead of the tire directly on the outer wall of the wheel. I typically do this periodically as I glue in a clockwise direction. By pushing the bead directly against the outer wall you are doing two things. First, you are creating a strong bond between the tire and the wheel. Secondly, you are making sure your tires will spin as true as possible.
- TIP: while CA Accelerator makes your glue more brittle, used correctly it can save you a lot of time without compromising the job. If you notice the inside of your tire rarely comes un-glued. This is because very little load is placed on the inside bead. So to save time I always spray a little Accelerator on the inside bead after gluing. However, I avoid spraying accelerator on the outside bead of the tire.
- Glue outside bead of tire the same as the inside minus using Accelerator. Let glue dry naturally for at least 10 minutes.
- Remove tire bands
- Mark tire numbers on inside of wheel.
- Place direction arrows on inside bead of tires to signal which tire is “Left” and “Right”
- Now place your tires in a sealed container until you are ready to break them in at the track.
On the next segment of RC Race Craft we will focus on tire break in, saucing / conditioning, and the finer details of getting your tires perfect and ready for the big race!